Standard Test Method for Apparent Shear Strength of Single-Lap-Joint Adhesively Bonded Metal Specimens by Tension Loading (Metal-to-Metal) - PDF
ASTM D1002 – Tensile Shear Strength of Single-Lap-Joint Adhesively Bonded Metal Specimens by Tension Loading (Metal-to-Metal)
Introduction
ASTM D1002 is a standardized test method developed by ASTM International for determining the apparent shear strength of adhesives used to bond metal-to-metal lap shear joints. This method applies to single-lap-joint specimens loaded in tension to produce shear stress at the bond line. It is widely used in aerospace, automotive, and industrial applications to evaluate the structural performance of adhesives.
The test is conducted using a universal testing machine (UTM) with specialized grips to ensure proper axial loading and prevent peel forces or specimen slippage. This guide provides a complete, step-by-step description of how to prepare, mount, and test specimens in accordance with ASTM D1002.
Equipment and Materials
1. Universal Testing Machine (UTM)
A calibrated universal testing machine capable of operating at controlled loading rates and measuring tensile forces with an accuracy of ±1% or better. The load cell should be appropriately sized to capture the expected failure loads without sacrificing resolution.
2. Grips
Use self-aligning tensile grips or wedge action grips with serrated or rubber-coated jaw faces to prevent slippage and ensure symmetric, axial loading. The grip faces must securely hold the metal tabs on either side of the bonded lap joint. Misalignment in loading can introduce unwanted peel stresses, invalidating the results.
Special grip fixtures such as bearing blocks or clevis-type grips may also be used to allow slight rotation of the specimen, further minimizing bending moments during testing.
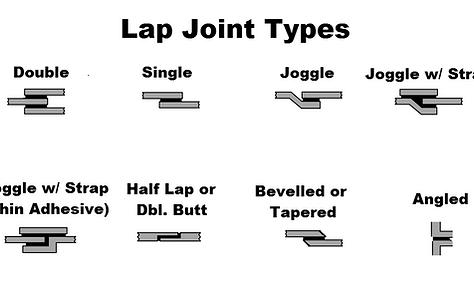
3. Specimens
-
Specimens consist of two overlapping metal coupons bonded together using the adhesive under evaluation.
-
The overlap length is standardized at 12.7 mm (0.5 in), and the typical specimen width is 25.4 mm (1.0 in).
-
The metal substrates are typically aluminum alloy 2024-T3 or other agreed-upon materials.
-
Specimen thickness is generally between 1.6 mm (0.063 in) and 3.2 mm (0.125 in).
4. Adhesive
The adhesive under test must be mixed, applied, and cured according to the manufacturer's specifications. Curing conditions (temperature, pressure, and duration) must be documented as part of the test report.
Specimen Preparation
-
Surface Preparation: Clean and prepare metal surfaces to promote adhesive bonding. Surface treatment may include grit blasting, solvent cleaning, or chemical etching, depending on the material and adhesive system.
-
Bonding: Apply adhesive to the overlap area and assemble the joint. Apply uniform pressure during the curing process to ensure even bond line thickness.
-
Curing: Cure the specimen under controlled conditions (temperature and time) per the adhesive manufacturer’s recommendations.
-
Machining: After curing, machine the specimen to final dimensions if required. Ensure the edges are smooth and free of defects that could initiate premature failure.
-
Conditioning: Unless otherwise specified, specimens should be conditioned at 23 ± 2°C (73.4 ± 3.6°F) and 50 ± 5% relative humidity for at least 40 hours prior to testing.
Test Procedure
1. Specimen Mounting
-
Insert the ends of the specimen into the grips of the tensile testing machine.
-
Ensure the bonded overlap area remains free from direct gripping.
-
Align the specimen so that the load is applied axially through the centerline to avoid bending stresses.
-
Use alignment aids or clevis pins if necessary.
2. Test Speed (Loading Rate)
-
Apply the tensile load at a crosshead speed of 1.3 mm/min ± 0.3 mm/min (0.05 in/min ± 0.01 in/min).
-
Maintain constant rate of grip separation throughout the test.
3. Data Collection
-
Record the maximum force (peak load) at failure.
-
Capture the load-displacement curve if available.
-
Note the mode of failure (adhesive, cohesive, or substrate failure).
4. Shear Strength Calculation
Calculate the apparent shear strength using the following formula:
τ=FA\tau = \frac{F}{A}τ=AF
Where:
-
τ\tauτ = Apparent shear strength (MPa or psi)
-
FFF = Maximum force at failure (N or lbf)
-
AAA = Bonded overlap area (mm² or in²), calculated as:
A=Overlap Length×Specimen WidthA = \text{Overlap Length} \times \text{Specimen Width}A=Overlap Length×Specimen Width
For standard specimens with a 12.7 mm overlap and 25.4 mm width, the bonded area is:
A=12.7 mm×25.4 mm=322.58 mm2A = 12.7 \, \text{mm} \times 25.4 \, \text{mm} = 322.58 \, \text{mm}^2A=12.7mm×25.4mm=322.58mm2
Reporting Requirements
According to ASTM D1002, the test report must include the following:
-
Specimen dimensions and material type
-
Adhesive type, lot number, and cure conditions
-
Surface preparation method
-
Number of specimens tested
-
Maximum force and calculated shear strength
-
Failure mode description and images (if available)
-
Environmental conditioning (if any)
-
Deviation from the standard procedure (if applicable)
Common Failure Modes
-
Adhesive Failure: Bond line separates cleanly from one or both substrates.
-
Cohesive Failure: Failure occurs within the adhesive layer, indicating good bonding to the substrates.
-
Substrate Failure: Metal substrate itself fails; indicates extremely high bond strength.
-
Mixed Mode: A combination of adhesive and cohesive failure.
Proper interpretation of failure mode is crucial for understanding adhesive performance.
Safety and Best Practices
-
Ensure proper personal protective equipment (PPE) when handling adhesives and operating testing machinery.
-
Avoid sudden tensile loading; always use the prescribed loading rate.
-
Discard any specimens with visible defects or misalignment before testing.
Conclusion
ASTM D1002 is an essential test method for evaluating the shear strength of adhesive bonds in metal-to-metal joints. When conducted properly, it provides reliable, reproducible data on the adhesive's mechanical performance under tension loading. By following the specimen preparation, testing procedure, and reporting requirements as outlined, users can generate results that meet industry standards and support critical product development and quality assurance processes.
For high-precision lap shear testing, it's recommended to use a high-quality universal testing machine, self-aligning grips, and ensure all specimens are prepared consistently and tested under controlled conditions.
ASTM D1002 - Lap Shear Tensile Test